-
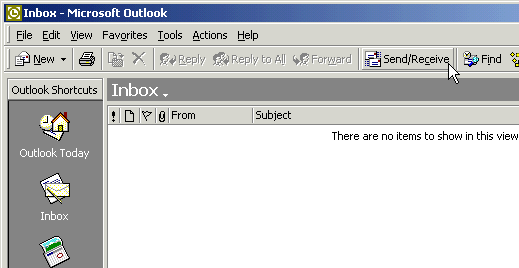
Open up Microsoft Outlook 2000
-
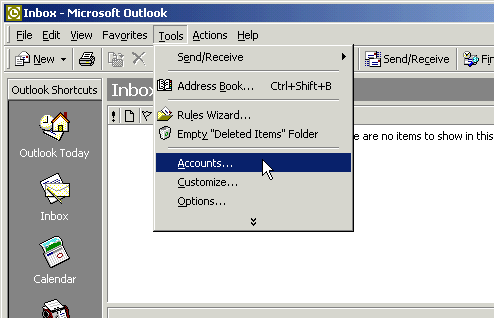
Click Tools on the Menu bar then select Accounts
-
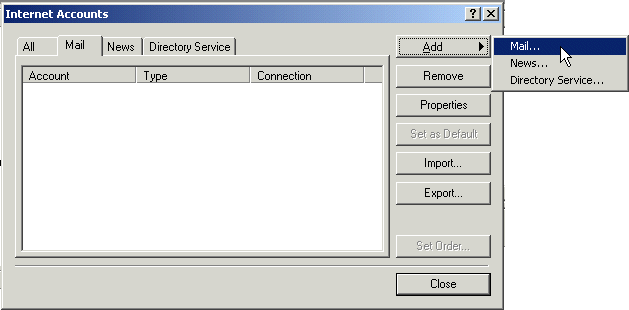
Click Add then select Mail
-
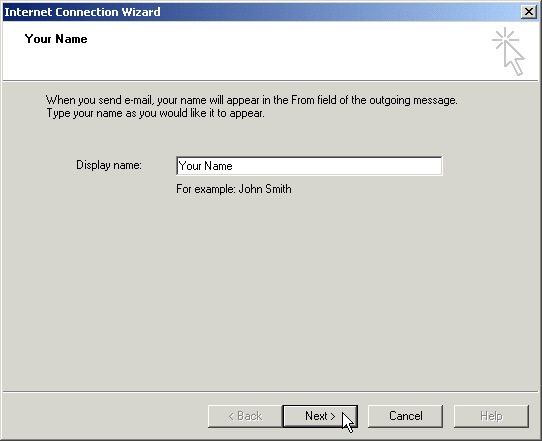
Enter in your name and click Next
-
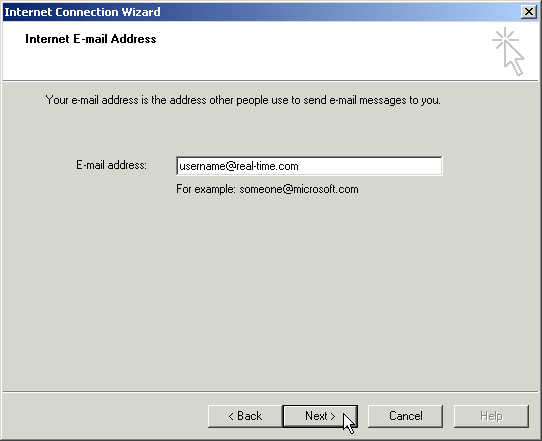
Specify the Email address that you want others to reply or send mail to you with. Click Next
-
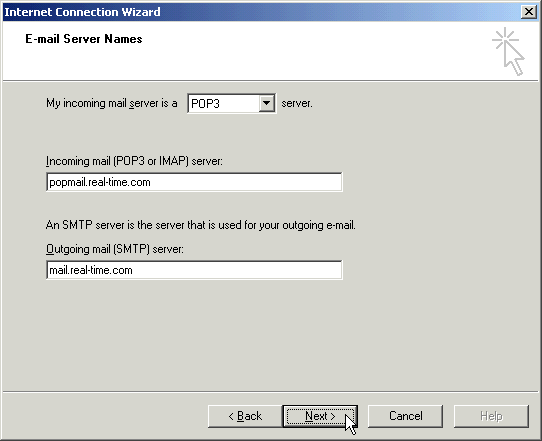
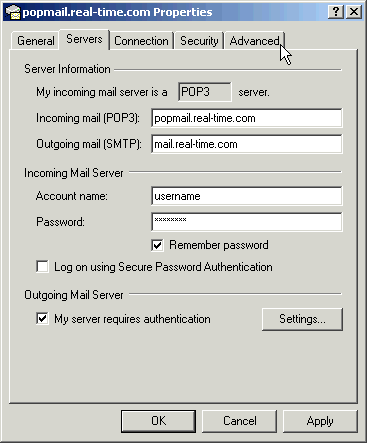
Select POP3 as the server type at the top of the window enter popmail.real-time.com for
the Incoming mail (POP3 or IMAP) server. Type mail.real-time.com for the Outgoing mail
(SMTP) server. Click Next
-
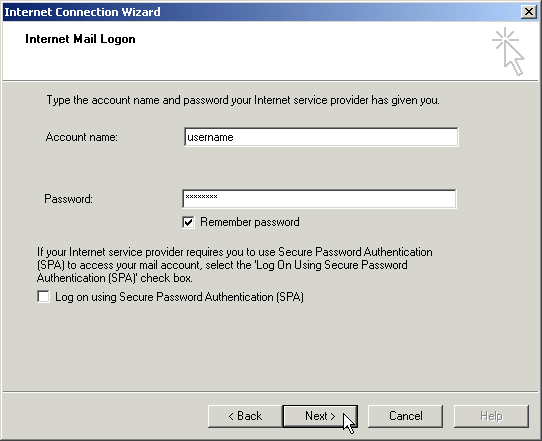
Type in the User (Account) Name and Password that was given to you by Real Time for accessing your
email account. The "Log on using Secure Password Authentication ((SPA)" Check mark box should be unchecked.
Click Next
-
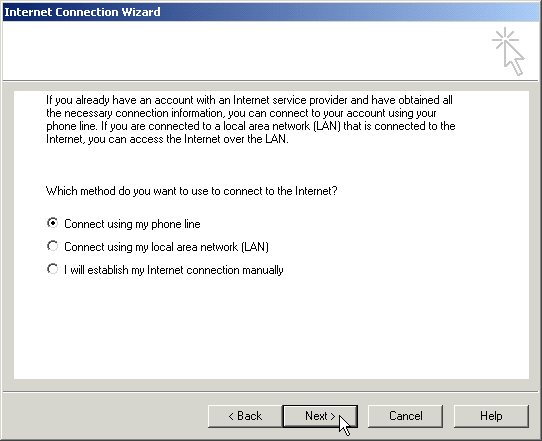
Select Connect using my phone line if you are using a modem, or appropriate Internet connection.
Click Next
-
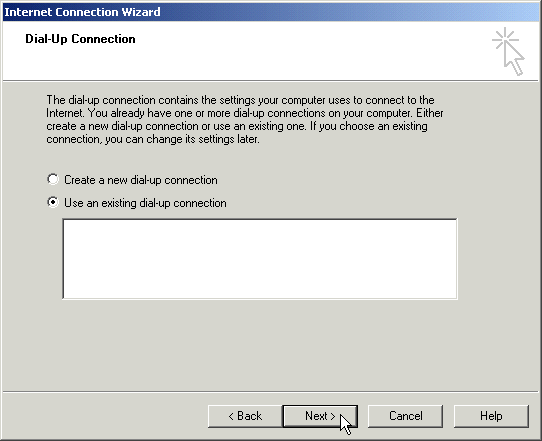
Select Use an existing dial-up connection. Click Next
-
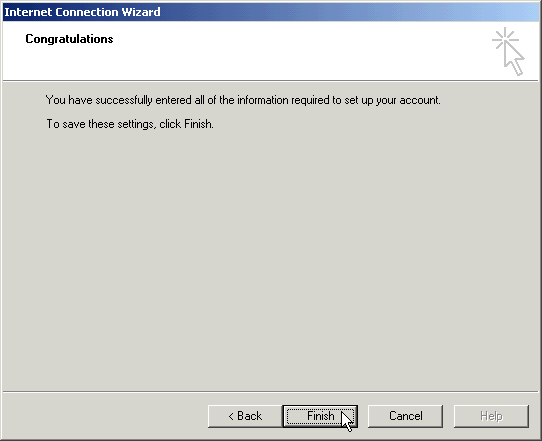
Click Finish
-
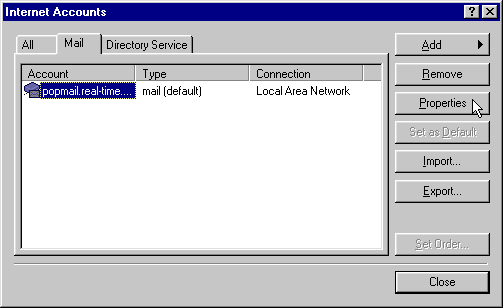
Left click on popmail.real-time.com so it is highlighted. Then click on Properties
-
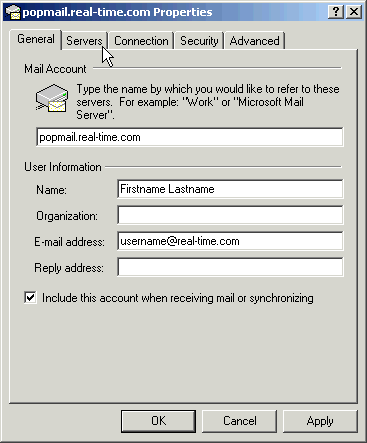
In the Properties window, make sure mail account is popmail.real-time.com. Place a check
in the box next to Include this account when receiving mail or synchronizing. Click on the Servers
tab to continue
-
Under the Outgoing Mail Server heading, place a check mark in the box next to My server
requires authentication Click on the Advanced tab
-
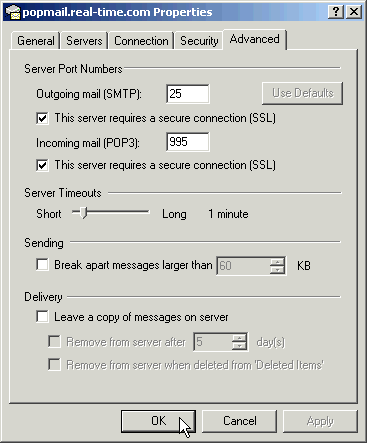
Place a check in the This server requires a secure connection (SSL) box under Incoming Mail
(POP3): heading (the Port Number automatically changes to 995.) Place a check in the This server
requires a secure connection (SSL) box under Outgoing mail (SMTP): heading, then click on OK
-
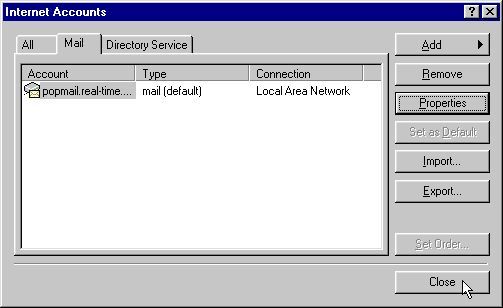
Click on Close in the Internet Accounts window
The instructions and screen shots contained within this website are specific to services offered by Real Time Enterprises only.
If you have any problems connecting to Real Time after carefully following these directions, please call (952) 943-8700 and we will
be happy to help you.
Permission is granted to copy, distribute and/or modify this
document under the terms of the GNU Free Documentation License,
Version 1.1 or any later version published by the Free Software
Foundation; with no Invariant Sections, no Front-Cover Texts and
no Back-Cover Texts. A copy of the license is included in the
section entitled "GNU Free Documentation License".


