Windows NT 4 VPN Configuration
|
More information about Real Time's products & services is available on our sales web site. Direct links for each item are listed below:

|
NOTE: The following instructions are for connecting to a Real Time Linux Firewall with VPN services only, if you are trying to connect to any other server, these instructions will not help you.
Take a look at Real Time's Firewall and VPN information to learn more about our Linux Solutions.
Requirements:
Windows NT 4 Service Pack 6a (High Encryption). Note that you must apply the Service Pack after
installing the PPTP packages.
-
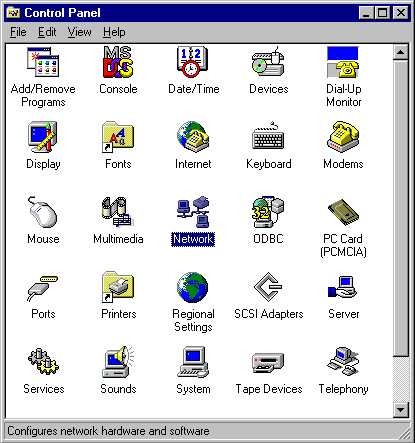
First, go to your Control Panel by clicking on the Start button, then Settings, then
Control Panel. Double-click the Network icon, shown below.
-
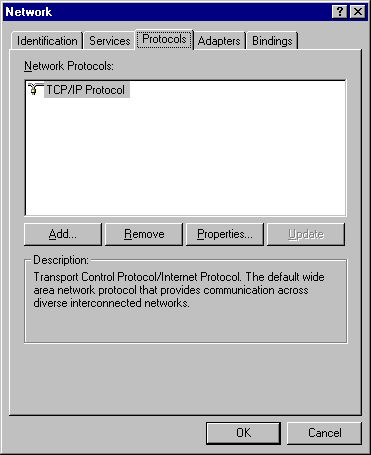
After clicking on the 'Protocols' tab, a window like the one pictured should appear. Click on
the 'Add' button.
-
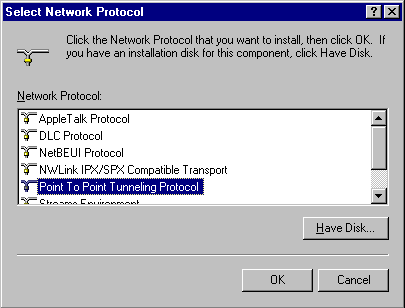
Find the entry for 'Point To Point Tunneling Protocol', then double-click to select it.
-
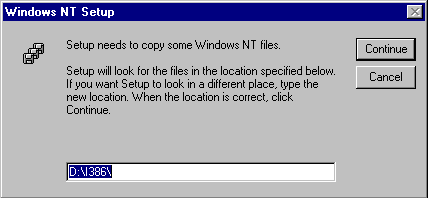
Windows will then want to install some files. You will need a Windows NT install CD at this point.
Put the CD in the CD-ROM drive, and click 'continue', to have Windows install the software.
-
After the software is installed, Windows will prompt you for the number of VPNs you wish to set up.
Since you only need one, choose the default '1'.

-
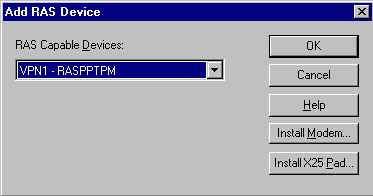
You will now need to configure Remote Access Services, so you can use them over PPTP. Click
'OK' on the dialog box pictured here.

-
Choose the VPN1 device from the drop-down list, and click 'OK'.
-
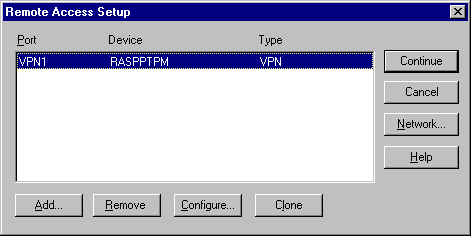
You will then see a dialog box listing all your VPN devices. Just click 'Continue' here.
-
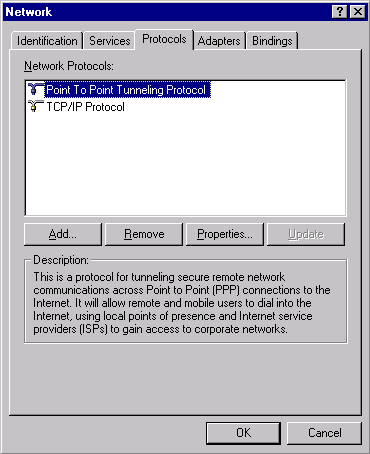
This will take you back to the Network Protocols window. There should now be an entry for 'Point
To Point Tunneling Protocol' there. Click 'OK'.
-
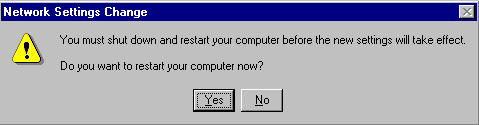
Windows will now want to reboot. Click 'Yes'.
-
At this point, install Windows NT 4 Service Pack 6a (High Encryption). Simply
download the file to your C:\temp directory, browse to it with Windows Explorer, then double-click on
it to install the Service Pack. This Pack is needed for PPTP to work properly.
Installing Windows NT Service Pack 6a
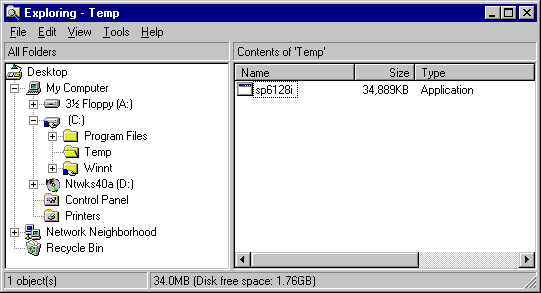
First, download the Service Pack to the c:\temp directory on your computer.
-
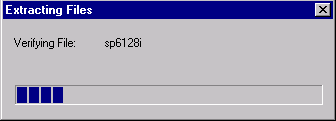
Double-clicking the file you just downloaded will cause it to extract its files, and launch the update
program.
-
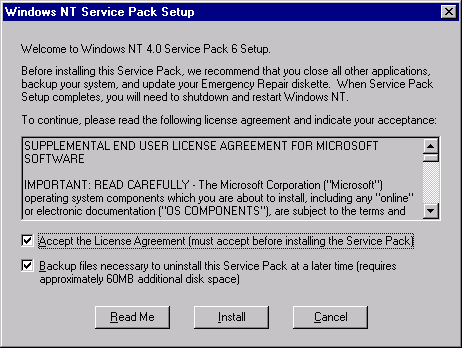
When it asks for you to accept the License Agreement, check 'Accept the License Agreement',
and click 'Install'.
-
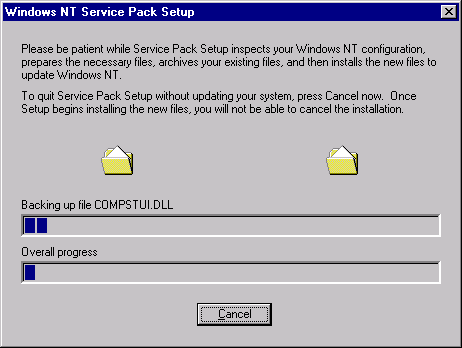
The Service Pack should then copy all the update files you need. In addition to updating the files
needed for PPTP to work properly, this will also update the rest of the files on your system to the latest
secure version.
-
Once the update is finished, Windows will ask you to reboot again.
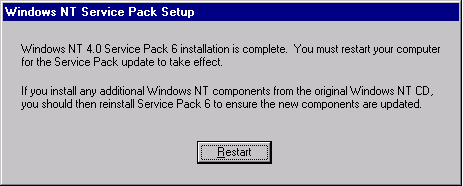
-
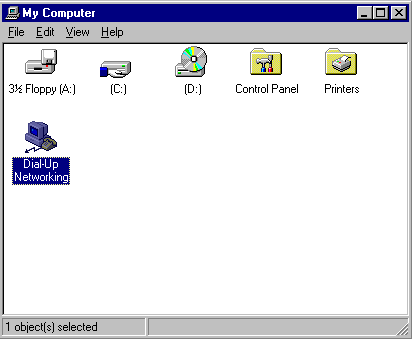
After installing the latest Service Pack and rebooting, double-click on the 'My Computer' icon
on your desktop. This should open up a window like the one shown. Double click on the 'Dial-Up Networking'
icon, highlighted in the picture.
-
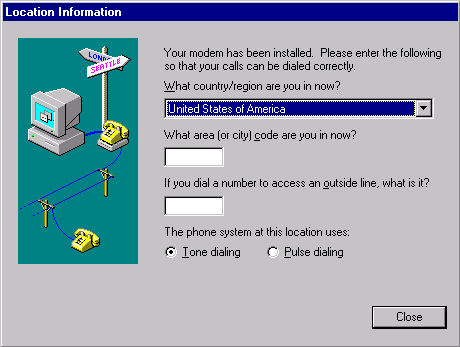
If you have never set up a Dial-Up Networking connection before, it will present you with this screen,
asking for your area code. Put in your area code and click 'Close'.
-
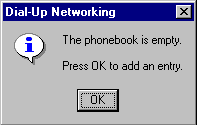
At this point, it may complain that 'The phonebook is empty'. This simply means you haven't
added any entries yet. Click 'OK'.
-
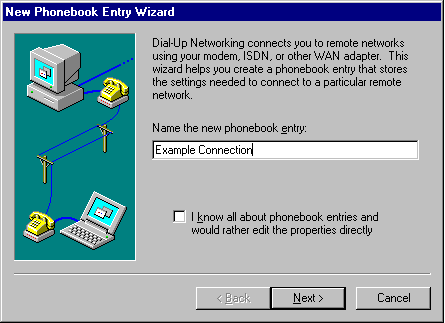
Next, it will ask you for a name for the new connection you are making. This is the name that will
appear by the icon once you have created the connection; but has no other significance. Click 'Next'.
-
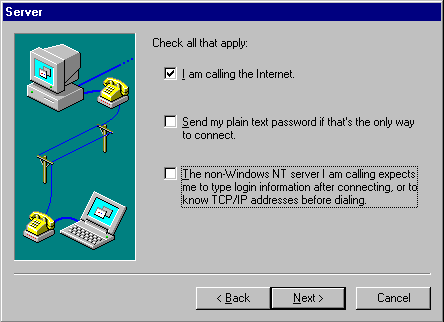
Make sure that only the 'I am calling the Internet' box is checked. Click 'Next'.
-
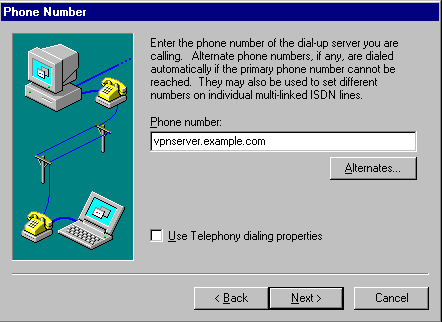
At the next dialog box, put in the address of the PPTP server. This information should have been given
to you at some point. Click 'Next'.
-
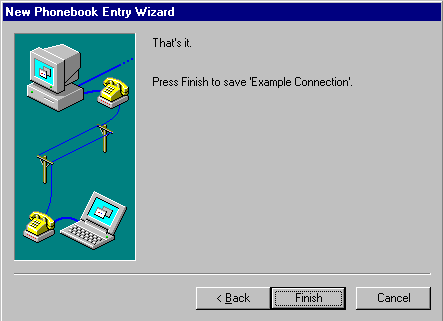
Click 'Finish' to finish setting up the connection profile. If you wish to have an icon
for Dial-Up Networking on your desktop, simply right click on the 'Dial-Up Networking' icon, choose 'Create
Shortcut' from the menu that appears, and answer 'yes' when it asks you if you'd like to put the icon
on the desktop.
-
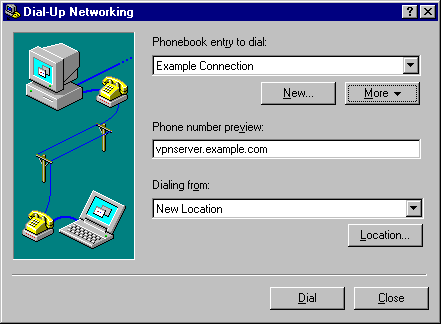
Now, double-click on your Dial-Up Networking icon, to get to the screen displayed here. Next,
click on the button titled 'More', and choose 'edit entry and modem properties' from the
drop-down list that appears.
-
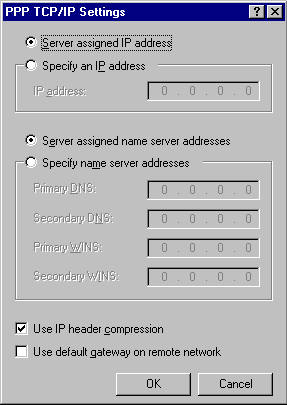
Click on the 'Server' tab' to get the screen shown. Then, click on the 'TCP/IP Settings'
button.

-
In 'PPP TCP/IP Settings' window, place a check in the following: Server assigned IP address,
Server assigned name server addresses and Use IP header compression. Afterwards, click 'OK'
to accept the changes; and then 'OK' and 'Close', to close the underlying windows.
-
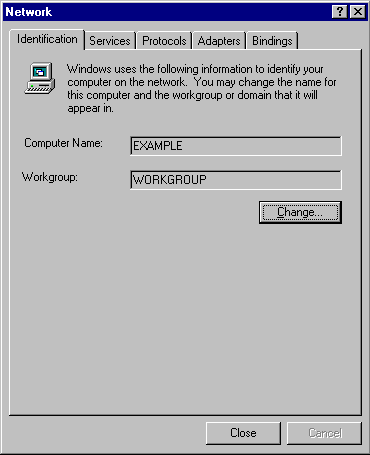
You will then need to change your computer's workgroup to that of the remote network, so that you may
successfully join the remote network's workgroup. Go to the Network icon on your Control Panel
again (via Start -> Settings -> Control Panel -> Network); then click on the 'Change'
button, and change the Workgroup entry, to that of the remote network's workgroup (that workgroup name
should be given to you, among your other VPN information). You can then close the 'Network' dialog
box. Windows may ask to be rebooted at this point.
Congratulations! You should be done at this point.
-
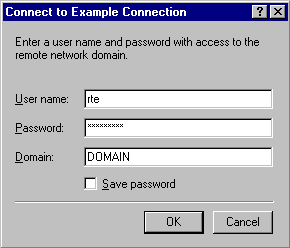
When you wish to connect to your PPTP server, double-click on the icon for Dial-Up Networking;
choose the connection you wish to dial; then click 'Dial'.
-
Now enter the password you were given along with your other VPN information, make sure your Domain
is set to the proper value (given in your information), and click 'OK' . This should launch your
PPTP connection, setting up a VPN between your computer, and the remote network you wish to connect to,
such that it appears you are on the remote network.
The instructions and screen shots contained within this website are specific to services offered by Real Time Enterprises only.
If you have any problems connecting to Real Time after carefully following these directions, please call (952) 943-8700 and we will
be happy to help you.
Permission is granted to copy, distribute and/or modify this
document under the terms of the GNU Free Documentation License,
Version 1.1 or any later version published by the Free Software
Foundation; with no Invariant Sections, no Front-Cover Texts and
no Back-Cover Texts. A copy of the license is included in the
section entitled "GNU Free Documentation License".
|
|
