Macintosh iMac Dial-Up Configuration
|
More information about Real Time's products & services is available on our sales web site. Direct links for each item are listed below:

|
Table of Contents
Setting Up Your Dial-up Connection
-
Double-click on your hard disk icon and locate the Assistants folder
-
Double-click on the Internet Setup Assistant icon:

-
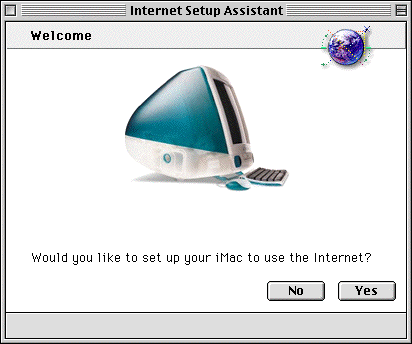
This will start the configuration process with the Internet Setup Assistant. Click Yes
to continue.
-
Click Yes again to continue.

-
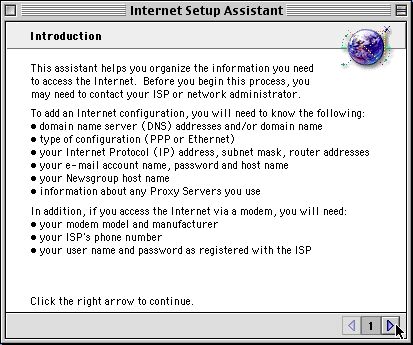
The Introduction screen will inform you as to what information you will need to provide in the
setup process. Click on the right arrow to continue.
-
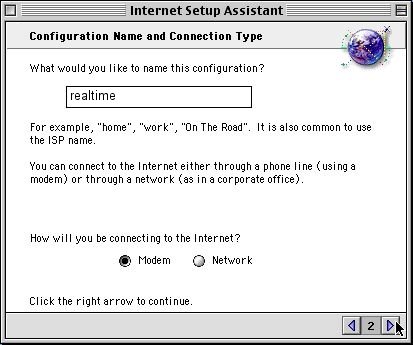
Type in realtime for a configuration name. Select Modem for your connection to
the Internet. Click the right arrow to continue.
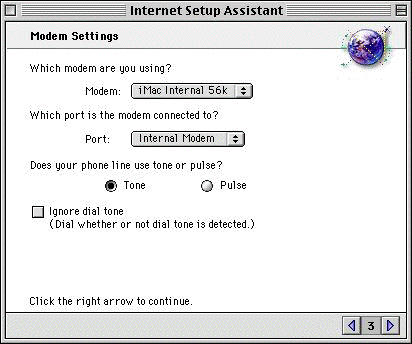
- Make sure that the modem and port settings are correct for your system. If this is the first time
you have set up your Internet connection and you have not made any changes to the settings on the Modem
Control Panel (
 followed by Control Panels
then Modem) then it is likely that the correct settings for the modem and the port will be displayed.
Click the right arrow to continue. followed by Control Panels
then Modem) then it is likely that the correct settings for the modem and the port will be displayed.
Click the right arrow to continue.
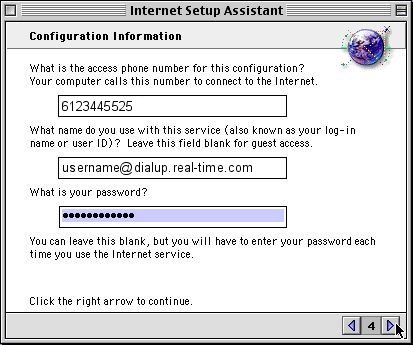
- Enter in the dial-up phone number, which is 6123445525. Refer to the Welcome Letter
that was faxed to you for your Username and Password and enter those in to the appropriate
fields. Click the right arrow to continue.
-
A PPP Connect Script is _not_ required. Select No and click the right arrow to continue.

-
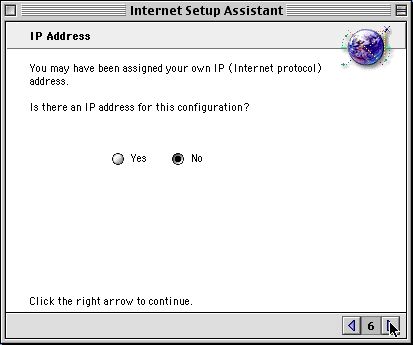
Unless otherwise requested, your dial-up account does not have a Static IP address. Select No
and click the right arrow to continue.
-
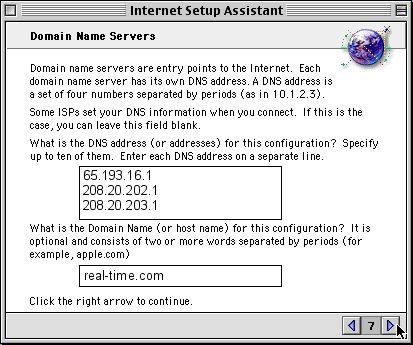
Enter in the following for DNS Server information:
- 65.193.16.1
- 208.20.202.1
- 208.20.202.1
- Enter in real-time.com as the Domain Name (or host name)
-
Click the right arrow to continue.
-
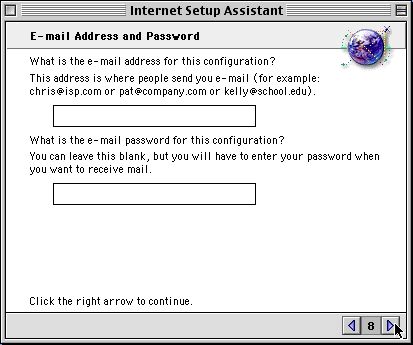
It is recommended that you do not enter any details for the E-Mail Address and Password at this point.
Click the right arrow to continue.
-
If you would like to use News service through Real Time, enter in news.real-time.com as the
NNTP host. Click the right arrow to continue.

-
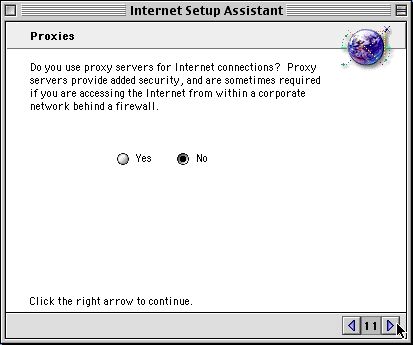
Select No for the proxy server option. Click the right arrow to continue.
-
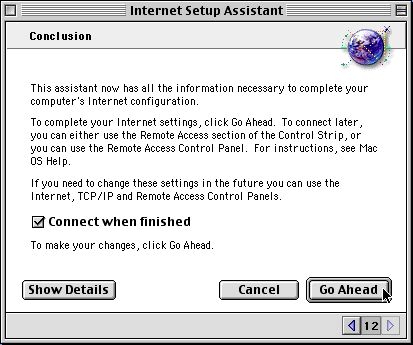
If you wish to test the Internet connection you have just set up leave the check mark in the
Connect when finished box and click on the Go Ahead button to test your Internet setup.
-
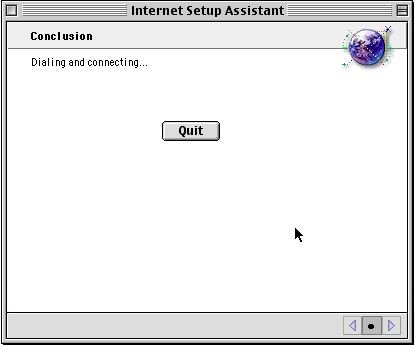
You should now see a "Dialing and connecting..." window as the system attempts to
access the Internet using the settings you entered.
-
If the connection is successfully established the dialogue box will clear. To check whether you are
connected to the Internet go to the
on the menu bar, select Remote Access Status, if you are successfully connected you will see a
display similar to the one below:

Connecting to the Internet
-
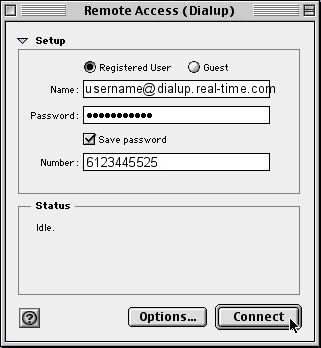
In order to connect to the Internet after you have configured your dial-up connection you will need
to use the Remote Access control panel (
followed by Control Panels then Remote Access)
-
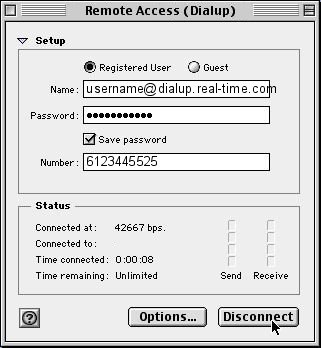
Click on the Connect button.
Disconnecting from the Internet
-
In order to disconnect from the Internet, you will need to use the Remote Access control panel or the
Remote Access Status (under the
menu) to disconnect from the Internet.
-
Click on the Disconnect button.
Troubleshooting
If you are having difficulties connecting here are some things that you need to ensure are correct
in order to enable an Internet connection via dial-up.
Checking the Remote Access
- Open the Remote Access control panel (,
Control Panels then Remote Access).
- Double check that you have the correct telephone number entered and that you have entered the appropriate
area code if necessary.
- Check that your account name is spelt correctly and in all lower-case letters.
- Since the password will be displayed as a series of bullets you will not know whether you have typed
you password correctly (remember these are case-sensitive as well), delete your password and re-type it
if in doubt.
Checking the Modem settings
-
Open the Remote Access control panel (,
Control Panels then Remote Access).
-
Select Remote Access.
-
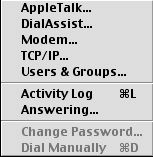
Select the Modem... option:
-
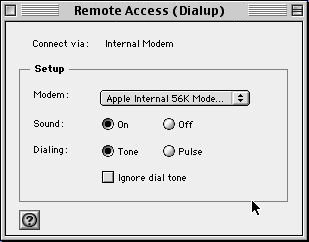
Double check the settings displayed here.
-
Make sure that you have the correct modem selected for your machine. If you are unsure what this setting
should be you will need to refer to the documentation that came with your machine or any documentation
you received with your modem.
-
If you use any services from your telephone service provider (such as an answering service) it may
mean that there is not always a dial tone on your line, if this is the case you should tick the Ignore
dial tone checkbox.
-
Check to see that your modem is connected to a telephone jack, and that the phone jack works.
Checking the TCP/IP settings
-
Open the Remote Access control panel (,
Control Panels then Remote Access).
-
Select RemoteAccess from the menu bar
-
Select the TCP/IP... option:
-
Confirm that the settings are correct.

The instructions and screen shots contained within this website are specific to services offered by Real Time Enterprises only.
If you have any problems connecting to Real Time after carefully following these directions, please call (952) 943-8700 and we will
be happy to help you.
Permission is granted to copy, distribute and/or modify this
document under the terms of the GNU Free Documentation License,
Version 1.1 or any later version published by the Free Software
Foundation; with no Invariant Sections, no Front-Cover Texts and
no Back-Cover Texts. A copy of the license is included in the
section entitled "GNU Free Documentation License".
|
|
