Mail Client Update
For instructions on how to update mail clients to use the Zimbra based email server. Linux Mac OS X Windows
How to update Evolution mail client on Linux to use Real Time's existing mail server. Evolution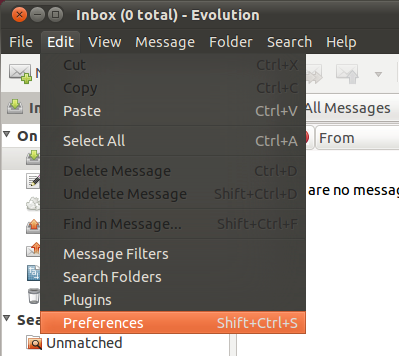 Launch Evolution and then click on Edit -> Preferences Evolution Preferences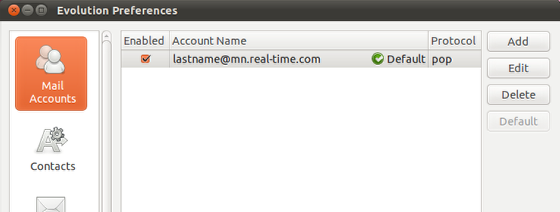 A new floating window will appear called Evolution Preferences, click the Edit button. Account Editor - Receiving Email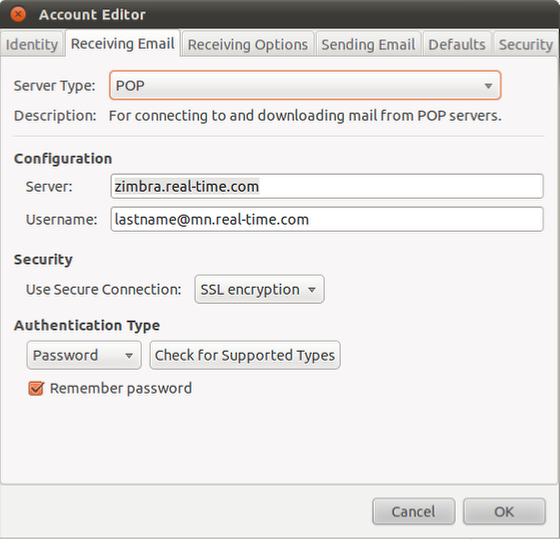 A new floating window will appear called Account Editor. Click on the Receiving Email tab and make the following changes.
Account Editor - Sending Email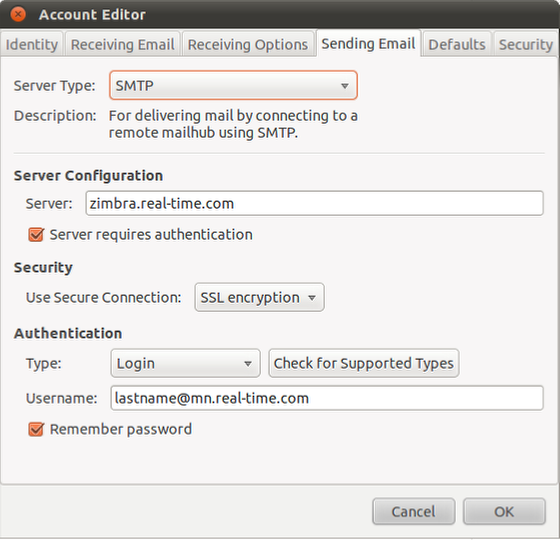 IMPORTANT: If your mail client is using a SMTP (Outgoing) server that is something other then mail.real-time.com - do not modify or change that! Click on the Sending Email tab at the top and make the following changes.
This will close the Account Editor window. Evolution Preferences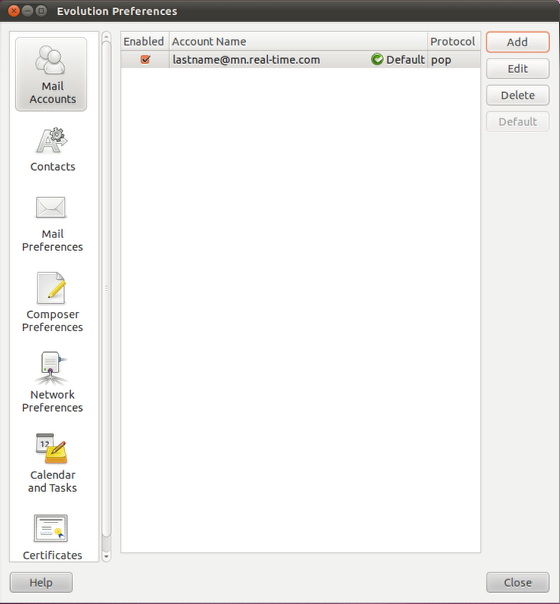 You should now see earlier window called Evolution Preferences, click on the Close button. Evolution Mail Client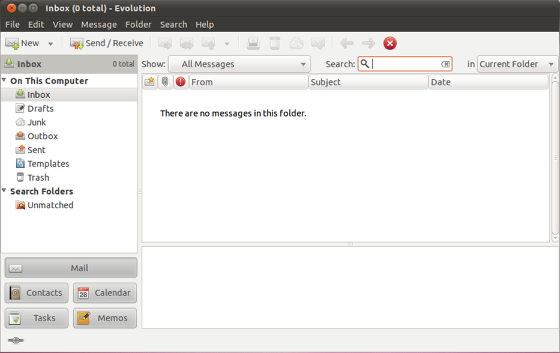 Evolution is now updated to use the new mail server.
How to update Mozilla Thunderbird on Linux to use Real Time's existing mail server. Mozilla Thunderbird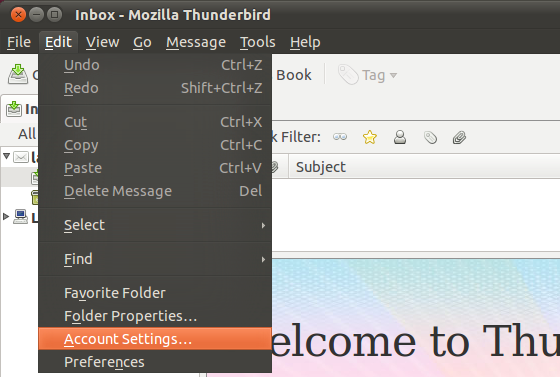 Launch Thunderbird and then click on Edit -> Account Settings... Thunderbird - Account Settings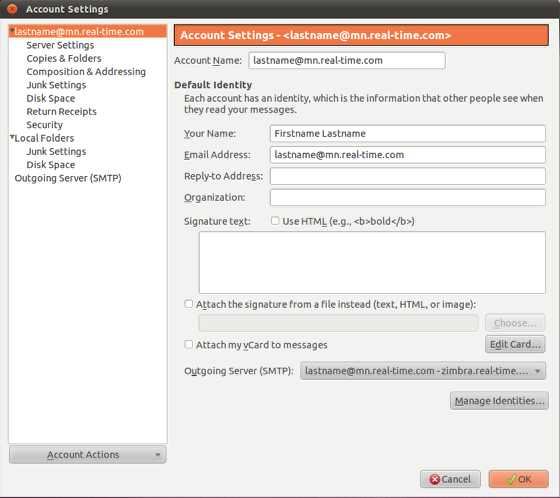 A new floating window will appear, called Account Settings Account Settings - Server Settings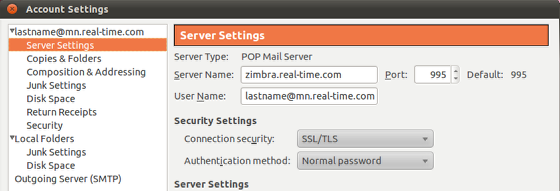 Left click on Server Settings on the left side of the window, and the right side will update with new information.
Account Settings - Outgoing Server (SMTP)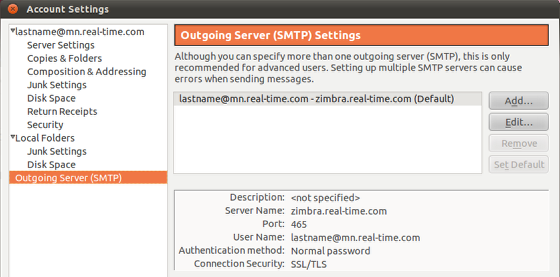 Left click on Outgoing Server (SMTP) on the left side of the window, and the right side will update with new information.
SMTP Server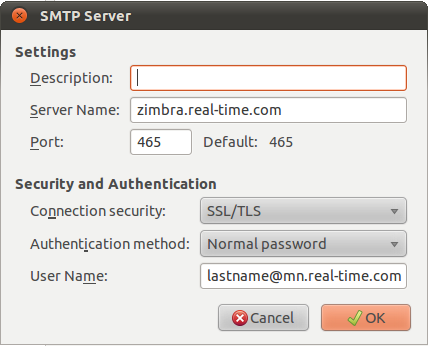 IMPORTANT: If your mail client is using a SMTP (Outgoing) server that is something other then mail.real-time.com - do not modify or change that! A new floating window called SMTP Server will appear and will need the following information updated.
Account Settings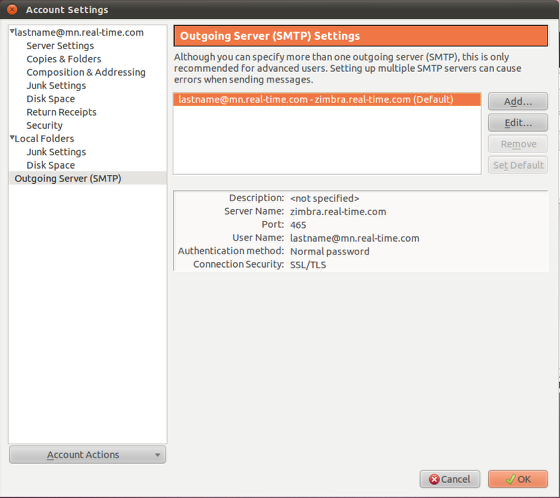 You should now see the Account Settings window again, click OK to close this window Mozilla Thunderbird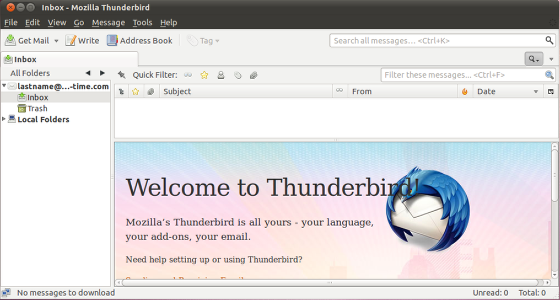 Mozilla Thunderbird is now updated to use the new mail server
How to update Outlook 2011 on Mac OS X to use Real Time's existing mail server. 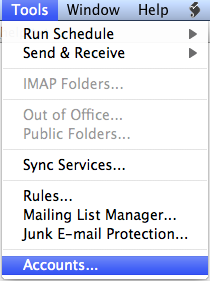 Launch Outlook and then click on Tools - > Accounts... Outlook 2011 - Accounts IMPORTANT: If your mail client is using a SMTP (Outgoing) server that is something other then mail.real-time.com - do not modify or change that! A new floating window called Accounts will appear. The following changes will need to be made:
Outlook 2011 on Mac OS X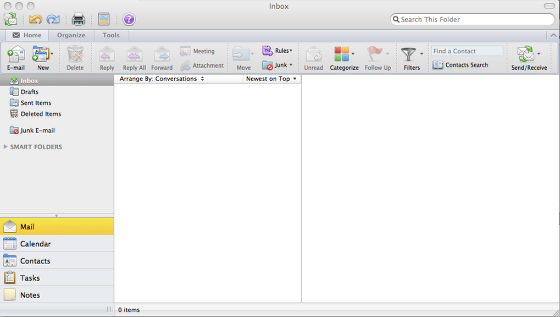 Outlook 2011 is now updated to use the new mail server.
How to modify Mozilla Thunderbird on Mac OS X to use Real Time's existing mail server. 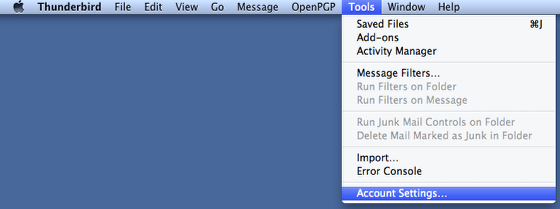 Launch Thunderbird and then click Tools -> Account Settings... Mozilla Thunderbird - Account Settings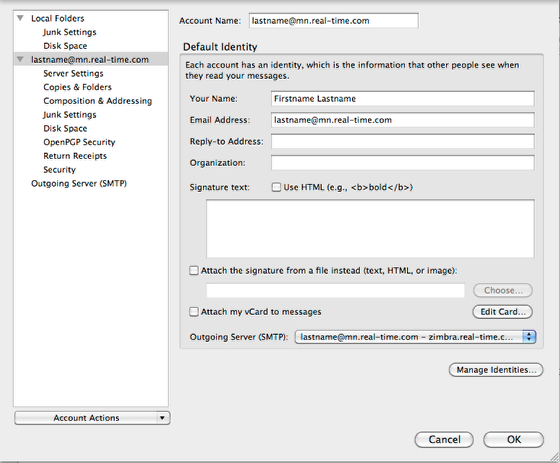 You will now see a floating window called Account Settings. Mozilla Thunderbird - Server Settings Click on Server Settings on the left side of the window. The right side will change and show settings for the Incoming Mail Server. The following changes need to be made:
Mozilla Thunderbird - Account Settings, Outgoing Server (SMTP)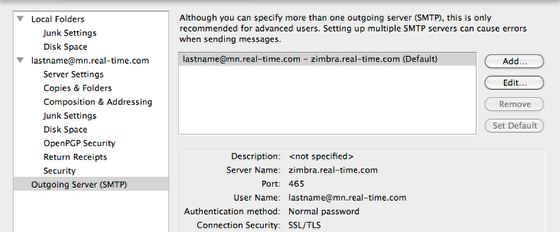 Click on Outgoing Server (SMTP) on the left side of the window. The right side will change and show settings for the Outgoing Server (SMTP) settings. Click on the Edit... button. SMTP Server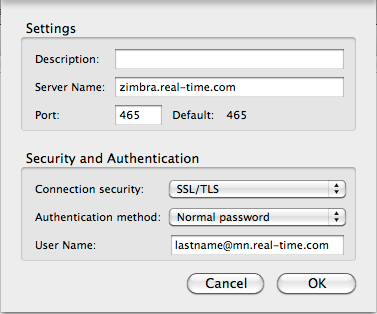 IMPORTANT: If your mail client is using a SMTP (Outgoing) server that is something other then mail.real-time.com - do not modify or change that! A floating window called SMTP Server will appear. The following changes will need to be made:
Mozilla Thunderbird - Account Settings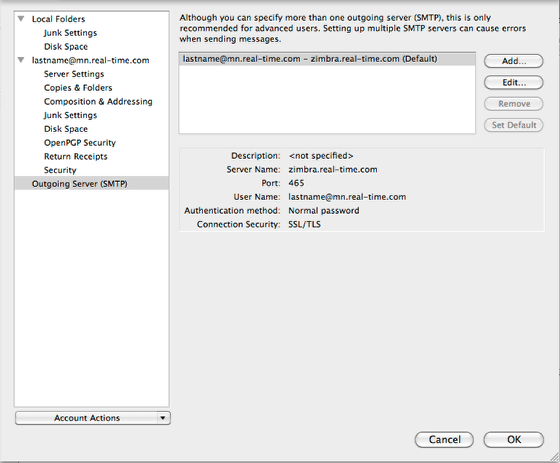 In the Account Settings Window, click OK Mozilla Thunderbird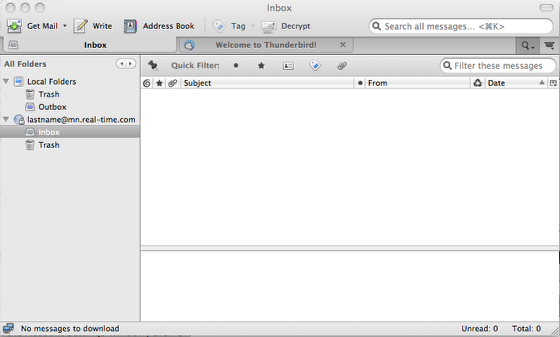 Mozilla Thunderbird is now updated to use the new mail server.
How to update Eudora on Windows to use Real Time's existing mail server. Eudora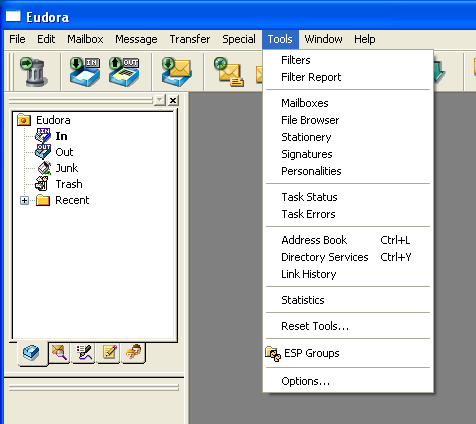 Launch Eudora, then click on Tools -> Options... Eudora - Options, Getting Started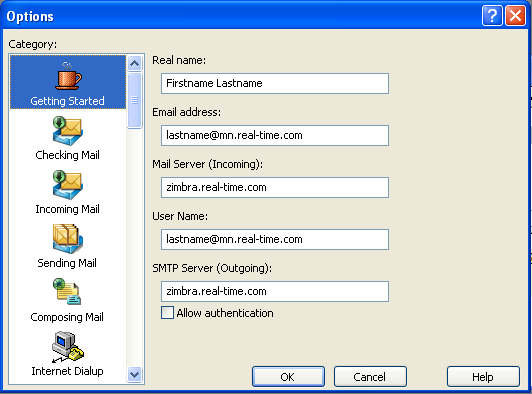 A new floating window called Options will open.
Eudora, Options - Checking Mail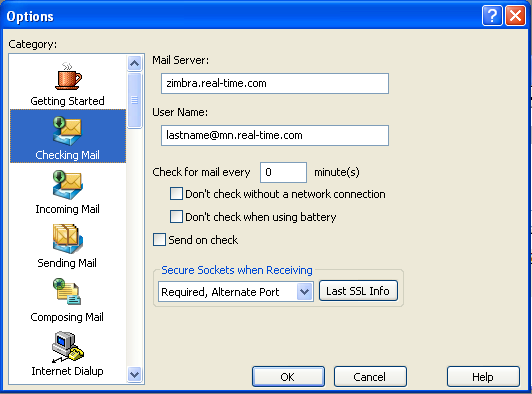 Click on the Checking Mail icon on the left side of the floating window. The right side will update with new information.
Eudora, Options - Incoming Email Click on the Incoming Email icon on the left side of the floating window. The right side will update with new information.
Eudora, Options - Sending Mail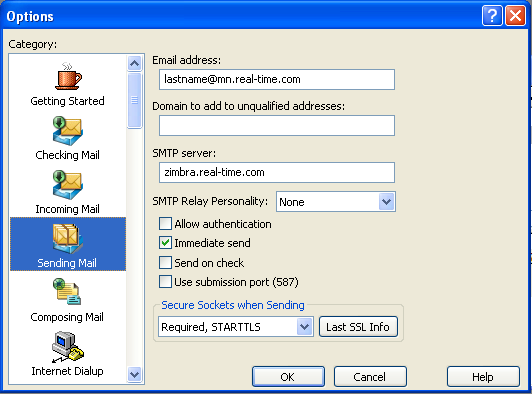 IMPORTANT: If your mail client is using a SMTP (Outgoing) server that is something other then mail.real-time.com - do not modify or change that! Click on the Sending Mail icon on the left side of the floating window. The right side will update with new information.
Eudora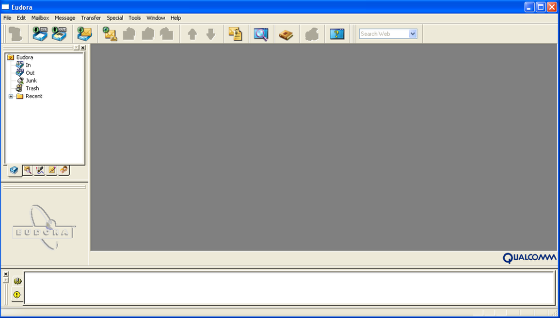 Eudora is now updated to use the new mail server. Eudora - Server SSL Certificate Rejected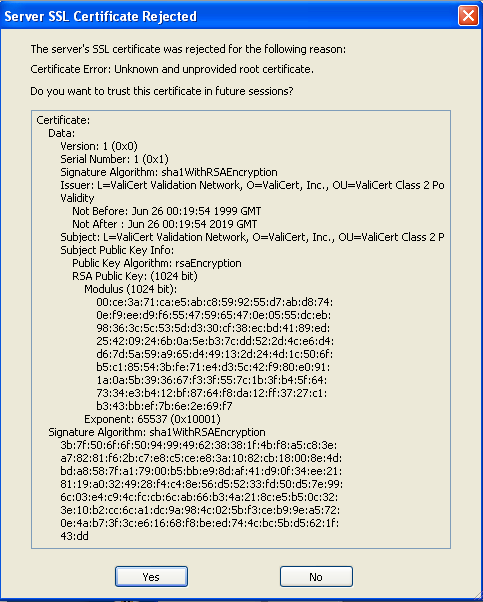 If you see a popup window in regards to the SSL Certificate, click on Yes. You have encountered this alert because the Certificate is new and unfamiliar to Eudora.
How to update or modify Outlook XP (2002) to use Real Time's existing mail server. Modify Outlook XP (2002) E-mail Accounts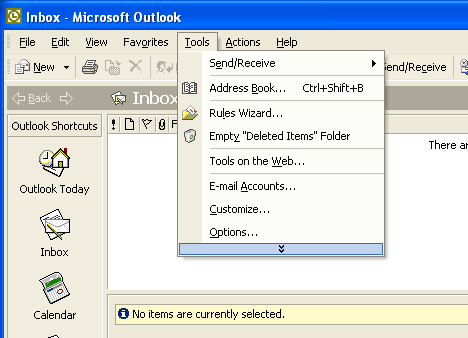 Launch Outlook and then click on Tools -> E-mail Accounts... E-Mail Accounts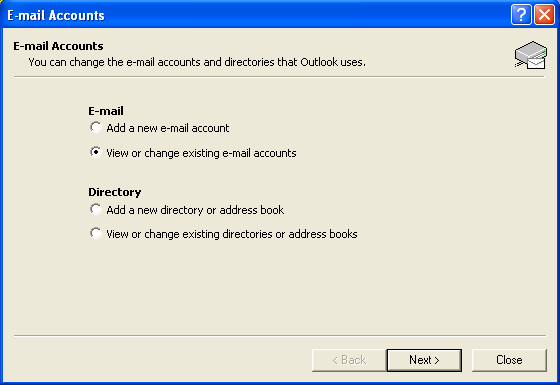 Make sure View or change existing e-mail accounts is selected. Click Next. E-Mail Accounts - Change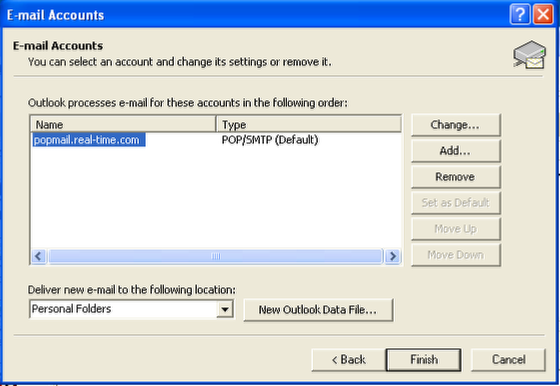 Make sure the mail account in question (i.e., popmail.real-time.com) is selected or highlighted and click the Change... button on the right. E-Mail Accounts - User Name and Servers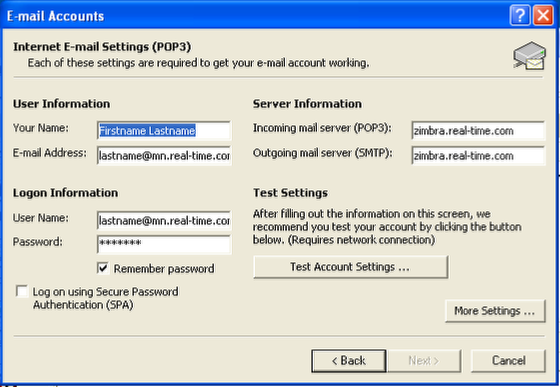 In the Account Settings window, the following updates need to be made:
Internet E-Mail Settings - Outgoing Server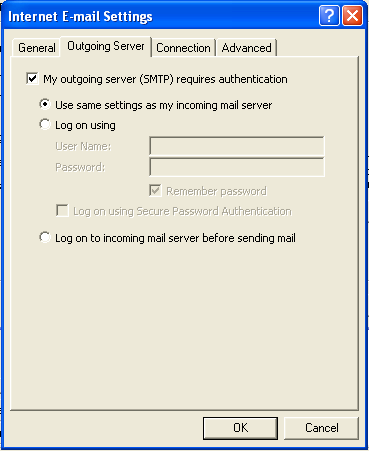 IMPORTANT: If your mail client is using a SMTP (Outgoing) server that is something other then mail.real-time.com - do not modify or change that! A new floating window will appear called Internet E-mail Settings
Internet E-mail Settings - Advanced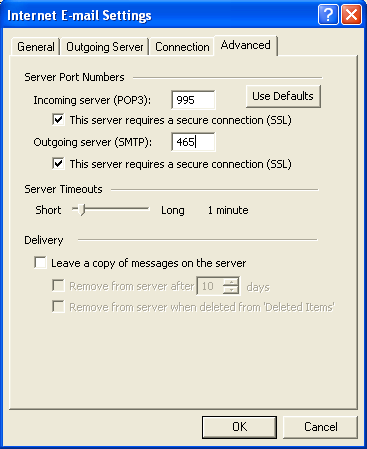 Click on the Advanced tab (last tab in the row)
E-mail Accounts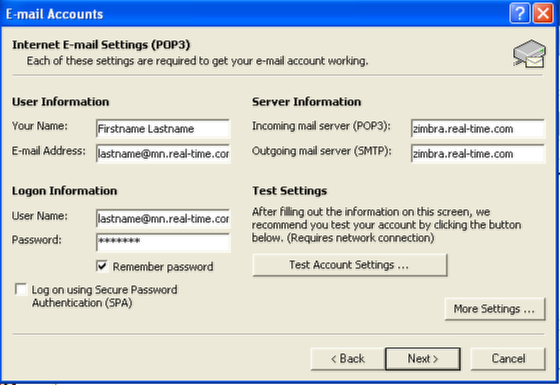 You should now see the E-mail Accounts window from earlier, click on Next. E-mail Accounts Click on the Finish button. Outlook XP (2002) - Mail Client Outlook is now updated to use the new mail server.
Update Outlook 2007 on Windows to use Real Time's existing mail server. 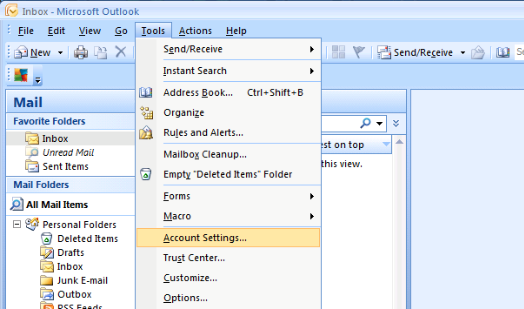 Launched Outlook 2007 and then click on Tools -> Account Settings... Account Settings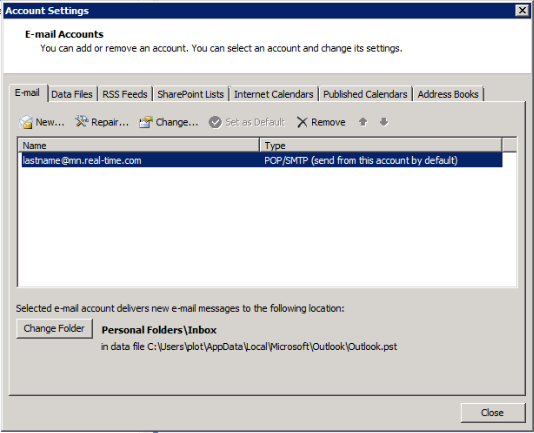 A new floating window will appear called Account Settings. Click on the Change... button (located in the row of buttons below the tabs) Change E-mail Account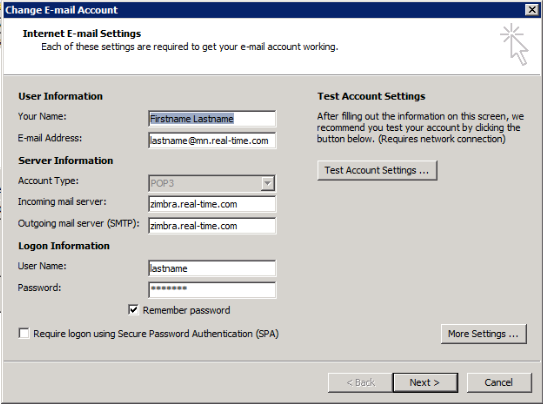 IMPORTANT: If your mail client is using a SMTP (Outgoing) server that is something other then mail.real-time.com - do not modify or change that! Another floating window will appear and display your mail account information. Proceed with the following changes.
Internet E-mail Settings - Outgoing Server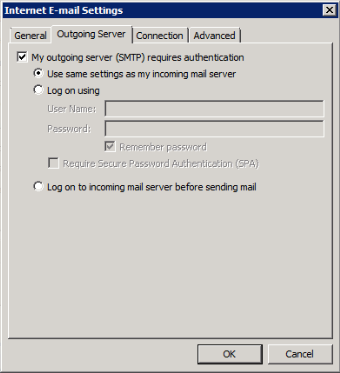 A new floating window will appear called Internet E-mail Settings. Click on the second tab, Outgoing Server
Internet E-mail Settings - Advanced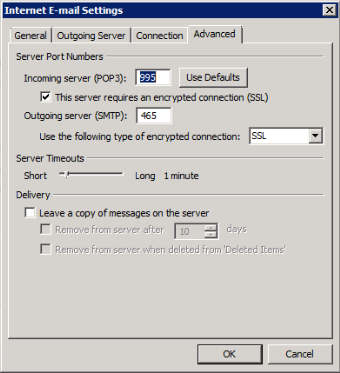 The following settings need to be updated.
Change E-mail Account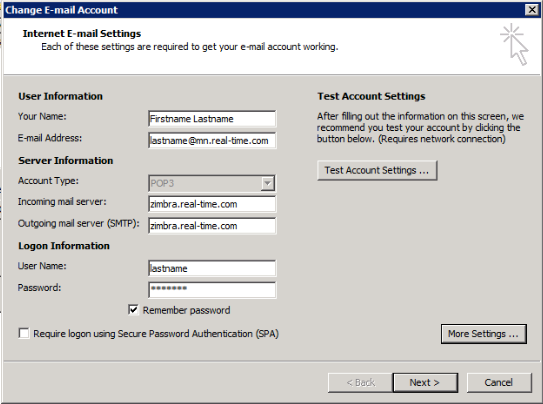 This will take you back to the earlier window called, Change E-Mail Account. Click on Next. Change E-mail Account - Finish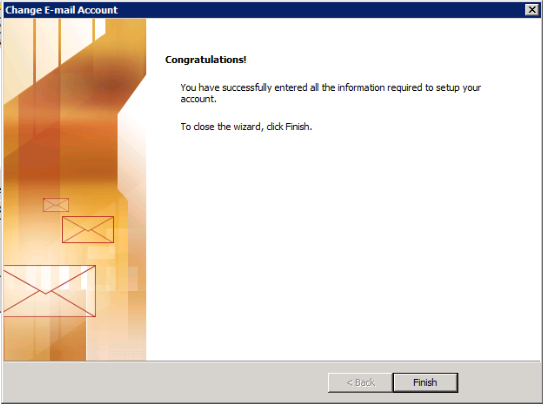 The window should update with a notice about the new changes are now in place. Click on Finish. Account Settings - Close You should now see the Account Settings window, click on Close. Outlook 2007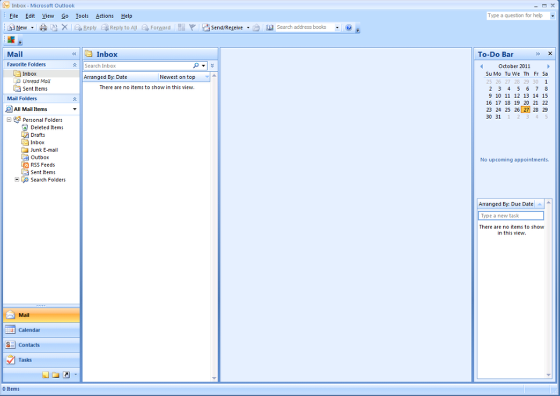 Outlook 2007 is now updated to use the new mail server. Update Outlook 2010 on Windows to use Real Time's existing mail server. Outlook 2010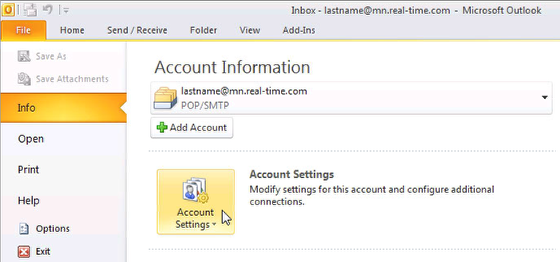 Launched Outlook 2010 and then click on File -> Account Settings (icon) Outlook 2010 - Account Settings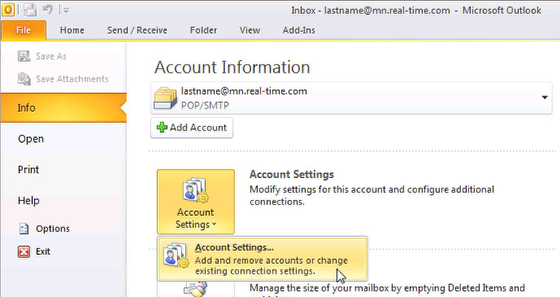 A drop down menu will appear, select Account Settings... Add and remove accounts or change existing connection settings. Outlook 2010 - Account Settings, Change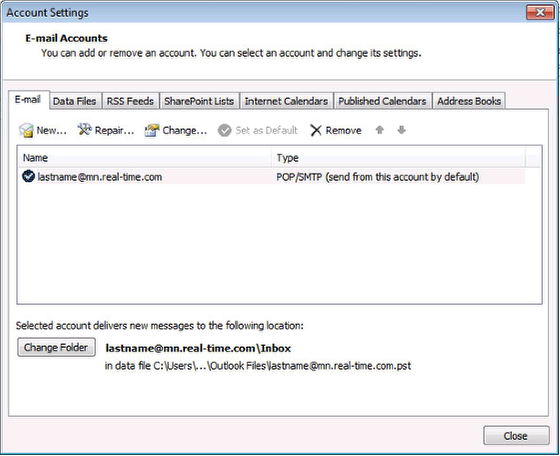 A new floating window will appear called Account Settings. Click on the Change... button (located in the row of buttons below the tabs) Outlook 2010 - Change Account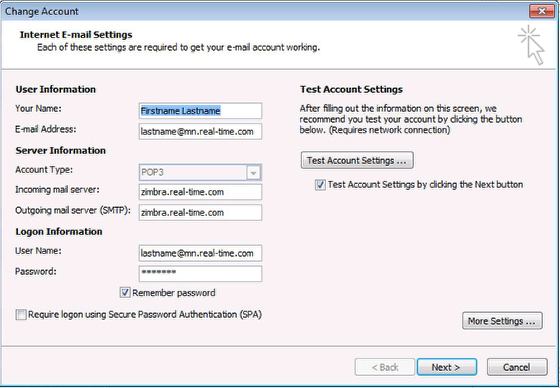 IMPORTANT: If your mail client is using a SMTP (Outgoing) server that is something other then mail.real-time.com - do not modify or change that! Another floating window will appear and display your mail account information. Proceed with the following changes.
Outlook 2010 - Outgoing Server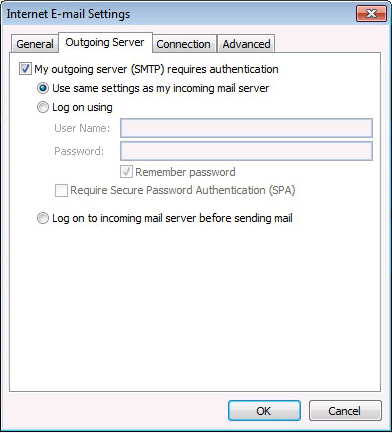 A new floating window will appear called Internet E-mail Settings. Click on the second tab, Outgoing Server
Outlook 2010 - Advanced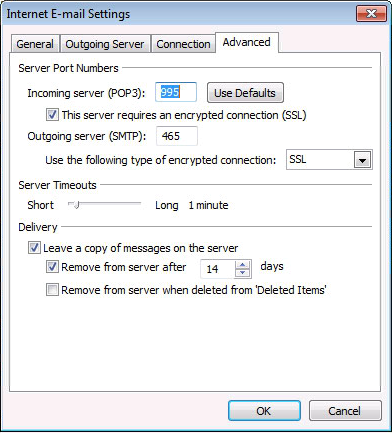 The following settings need to be updated.
Outlook 2010 - Change Account, Next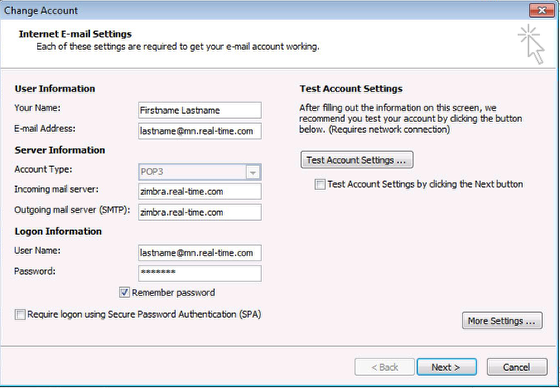 This will take you back to the earlier window called, Change E-Mail Account. Click on Next. Outlook 2010 - Finish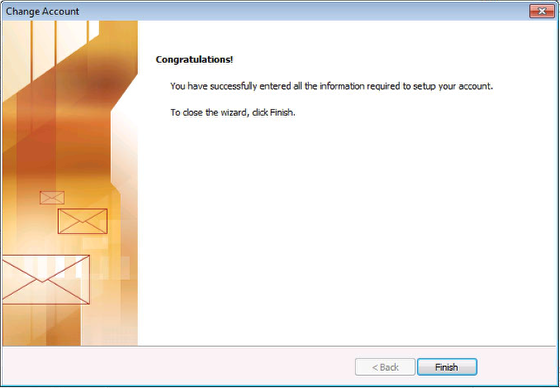 The window should update with a notice about the new changes are now in place. Click on Finish. Outlook 2010 - Account Settings, Close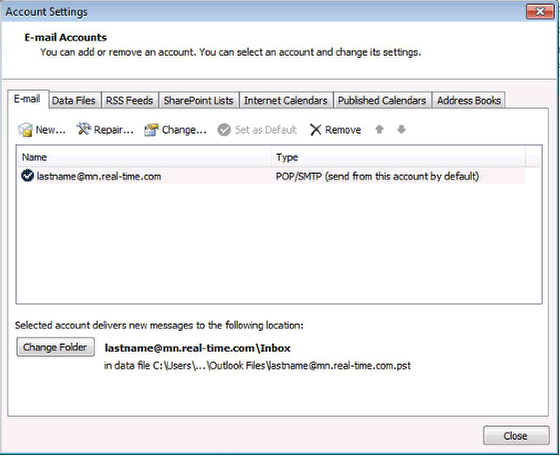 You should now see the Account Settings window, click on Close. Outlook 2010 Outlook 2010 is now updated to use the new mail server.
How to update Thunderbird on Windows to use Real Time's existing mail server. Thunderbird Account Settings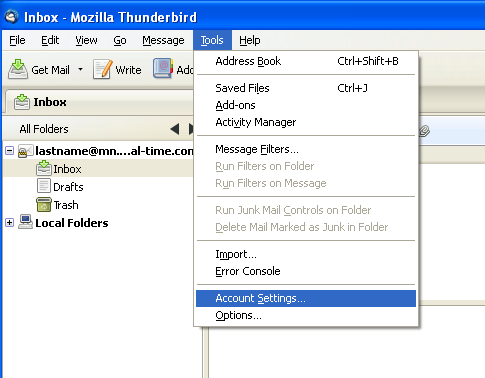 Launch Thunderbird and click on Tools -> Account Settings... Account Settings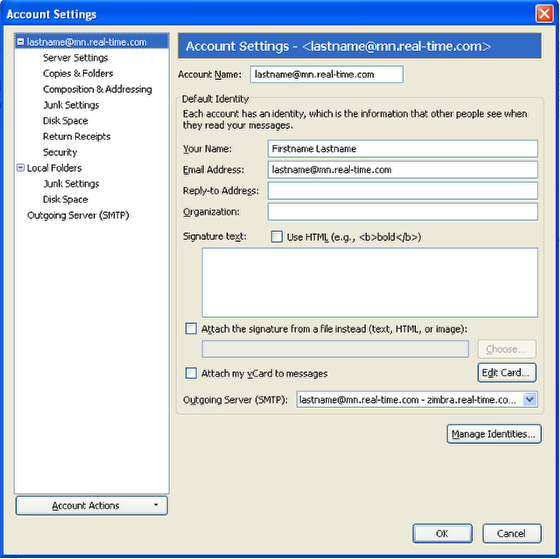 You will now see a floating window called Account Settings. Account Settings - Server Settings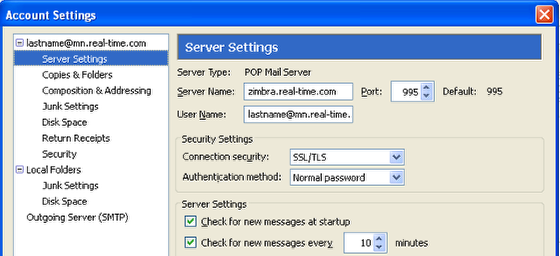 Click on Server Settings on the left side of the window. The right side will change and show settings for the Incoming Mail Server. The following changes need to be made:
Account Settings - Outgoing Server (SMTP)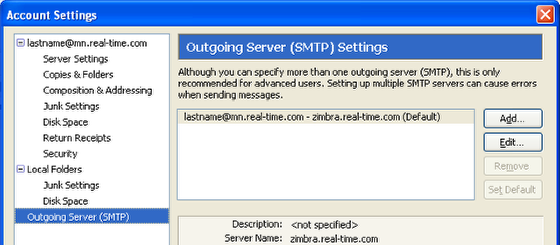 Click on Outgoing Server (SMTP) on the left side of the window. The right side will change and show settings for the Outgoing Server (SMTP) settings. Click on the Edit... button. SMTP Server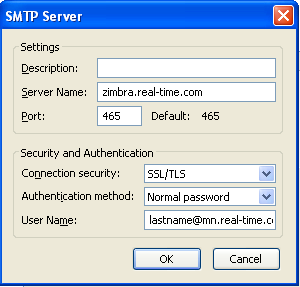 IMPORTANT: If your mail client is using a SMTP (Outgoing) server that is something other then mail.real-time.com - do not modify or change that! A floating window called SMTP Server will appear. The following changes will need to be made:
Account Settings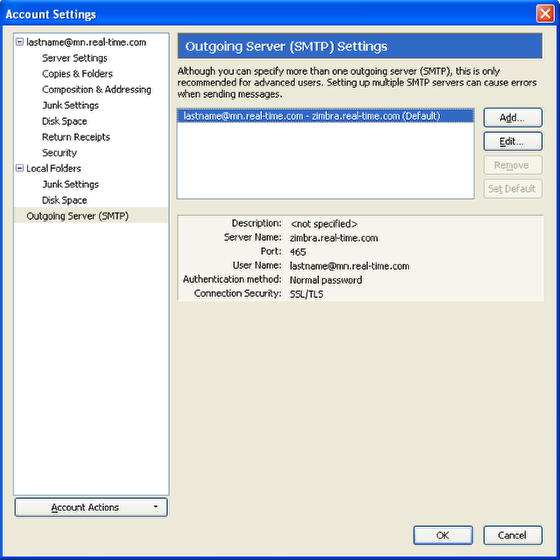 In the Account Settings Window, click OK Mozilla Thunderbird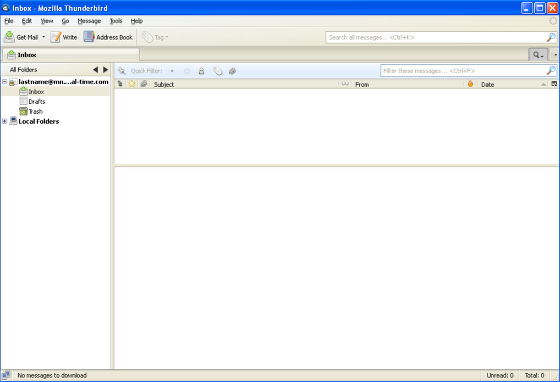 Mozilla Thunderbird is now updated to use the new mail server.
The instructions and screen shots contained within this website are specific to services offered by Real Time Enterprises only.
Permission is granted to copy, distribute and/or modify this document under the terms of the GNU Free Documentation License, Version 1.1 or any later version published by the Free Software Foundation; with no Invariant Sections, no Front-Cover Texts and no Back-Cover Texts. A copy of the license is included in the section entitled "GNU Free Documentation License". |
|
Real Time Enterprises, Inc. Phone: (952) 943-8700 |
