Sylpheed Configuration
|
More information about Real Time's products & services is available on our sales web site. Direct links for each item are listed below:

|
Sylpheed is a a GTK+ based, lightweight, and fast email client.
Official Site:
http://sylpheed.sraoss.jp/en/
FAQ:
http://sylpheeddoc.sourceforge.net
Download:
http://sylpheed.sraoss.jp/en/download.html
Configuration:
Initial setup:
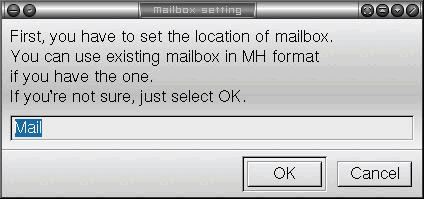
When you run Sylpheed for the first time, it will ask you where you want to store your mailboxes. The
default is <homedir>/Mail. You can change this to anything you like as long as it is a valid directory
name.
-
Launch Sylpheed
-
Click OK
- With the Basic tab selected, proceed with the following:
- In the Name of this Account Name field, enter real-time.com
- In the Full Name field, enter your first and last name
- In the Mail Address field, enter your email address
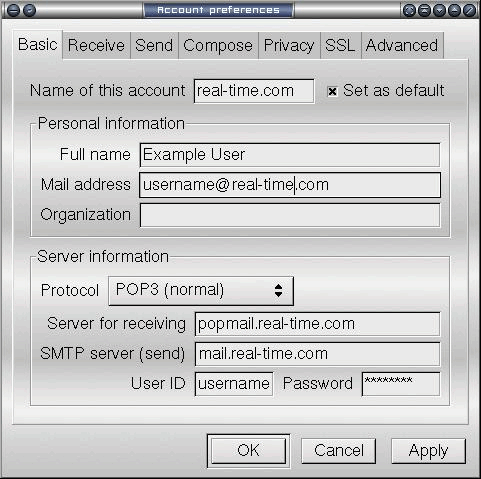
- With the Basic tab still selected, refer to the Server information section and proceed with
the following:
- Select POP3 (normal) from the dropdown box
- In the Server for receiving field, enter popmail.real-time.com
- In the SMTP server (send) field, enter mail.real-time.com
- In the User ID field, enter your username (or login name)
- In the Password field, enter your password
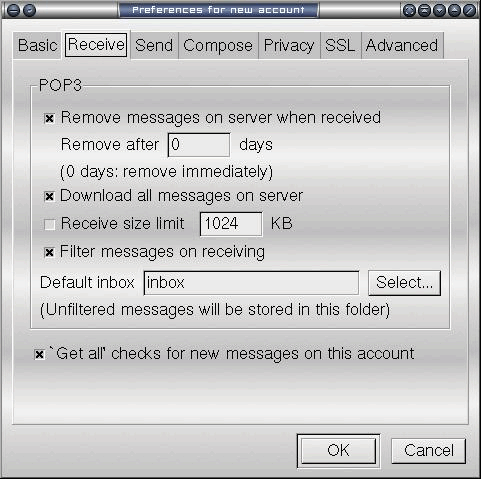
- Click on the Receive tab and proceed with the following:
- Place a check in front of Remove messages on server when received
- Place a check in front of Download all messages on server
- Place a check in front of Filter messages on receiving
- Leave the Default inbox as inbox
- Place a check in front of 'Get all' checks for new messages on this account
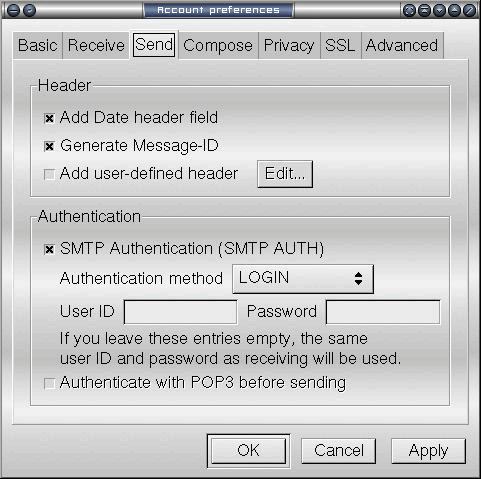
- Click on the Send tab and proceed with the following:
- Place a check in front of Add Date header field
- Place a check in front of Generate Message-ID
- Place a check in front of SMTP Authentication (SMTP AUTH)
- Select LOGIN from the Authentication method dropdown box
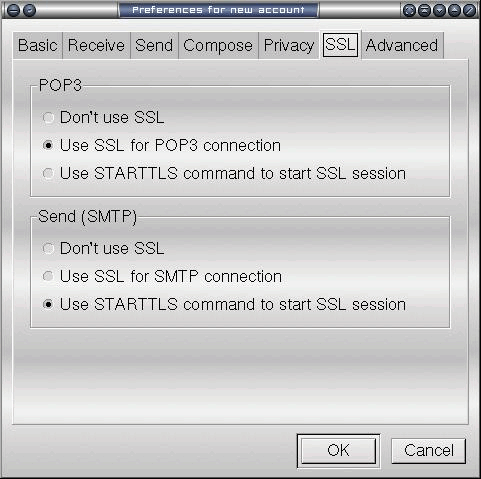
- Click on the SSL tab and proceed with the following:
- In the POP3 section, place a check in front of Use SSL for POP3 Connection
- In the Send (SMTP) section, place a check in front of Use STARTTLS command to start SSL
session
- Click OK
-
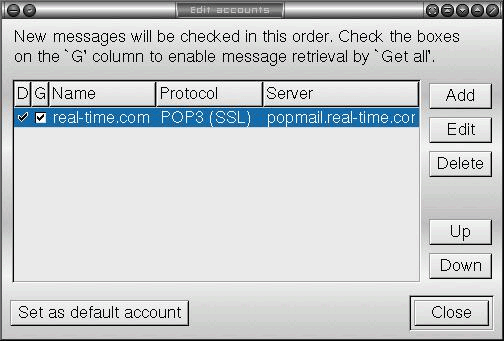
Click Close in the Edit Accounts window
-
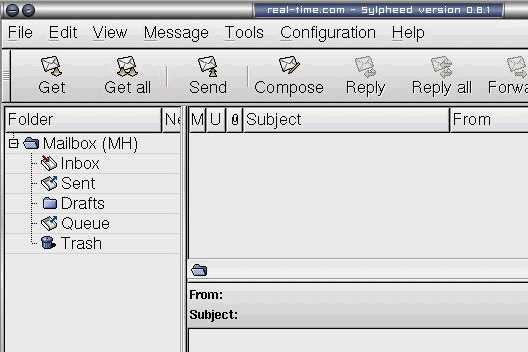
Sylpheed is now setup for sending and receiving email
The instructions and screen shots contained within this website are specific to services offered by Real Time Enterprises only.
If you have any problems connecting to Real Time after carefully following these directions, please call (952) 943-8700 and we will
be happy to help you.
Permission is granted to copy, distribute and/or modify this
document under the terms of the GNU Free Documentation License,
Version 1.1 or any later version published by the Free Software
Foundation; with no Invariant Sections, no Front-Cover Texts and
no Back-Cover Texts. A copy of the license is included in the
section entitled "GNU Free Documentation License".
|
|


